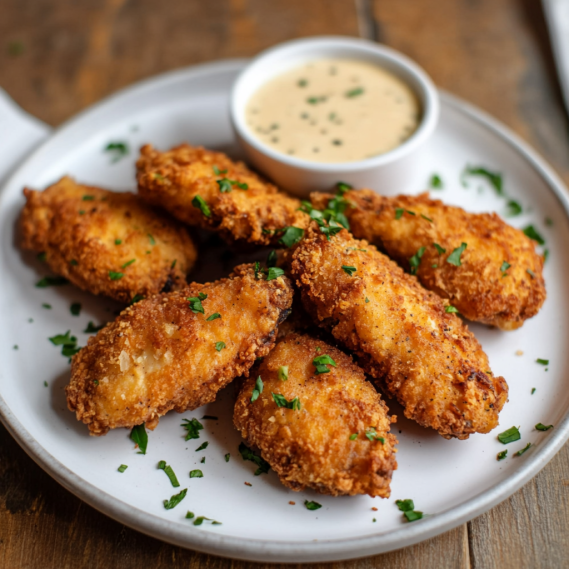
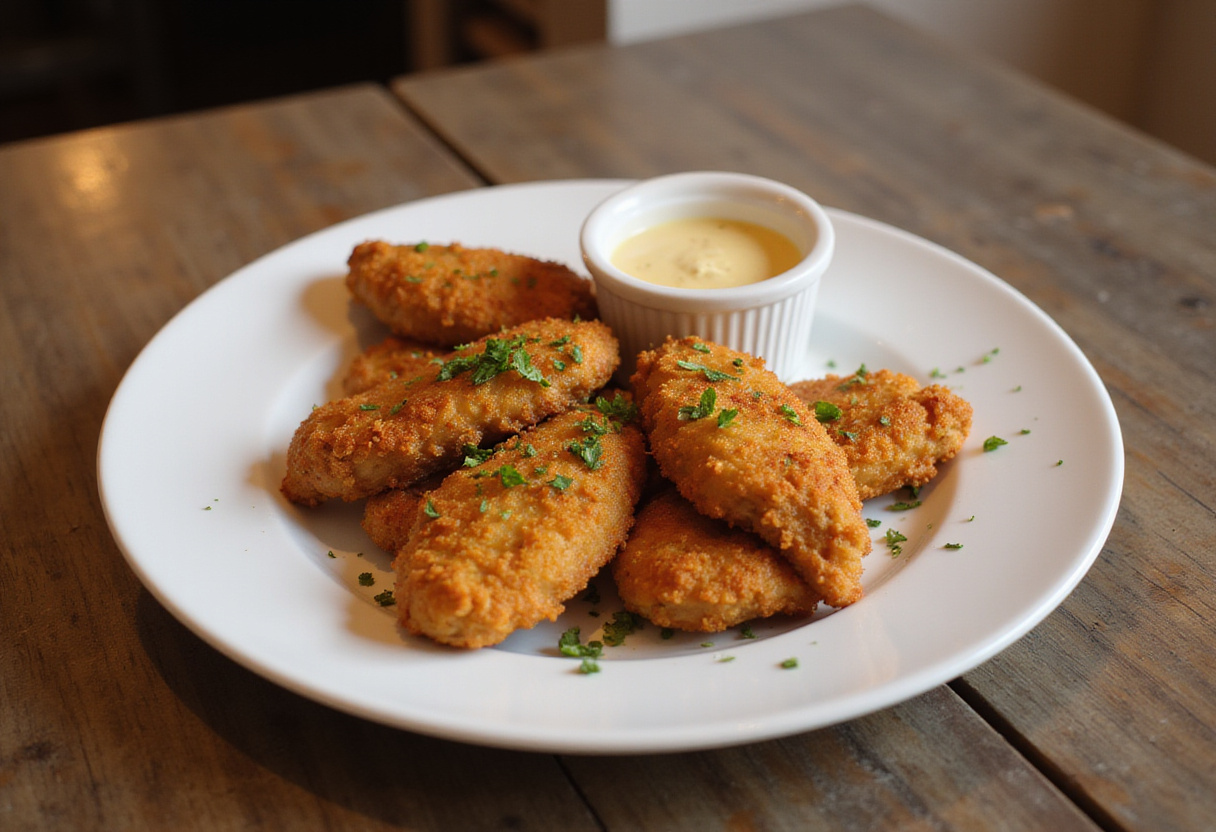
Crispy Homemade Baked Chicken Tenders: A Crunchy and Flavorful Delight 🍗✨💖
1. Introduction: The Quest for Perfect Crispy Homemade Baked Chicken Tenders
If you’re on a relentless search for the perfect crispy homemade baked chicken tenders, your delicious quest ends here! These aren’t just any chicken tenders; they combine incredibly tender chicken with a perfectly seasoned, delightfully crunchy coating, instantly making them a surefire family favorite. They’re not only easy to prepare but also incredibly satisfying. These baked chicken tenders are a healthier, guilt-free alternative to their fried counterparts, boasting all the craveable flavor without the unnecessary extra oil. Skip the takeout and level up your dinner game with this easy recipe! In this article, we’ll expertly guide you step-by-step through the process of crafting these truly mouthwatering delights. Get ready to discover all the insider secrets to achieving that covetable golden crust and savory goodness with each and every single bite!
2. Ingredient List: What You Need for the Best Baked Chicken Tenders
Here’s what you’ll need to create the ultimate crispy chicken tenders:
- 1 pound chicken tenders (ensure they are fresh and of good quality)
- 1 cup all-purpose flour (for that initial perfect coating)
- 1 teaspoon garlic powder (adds a savory depth)
- 1 teaspoon onion powder (enhances the overall flavor)
- 1 teaspoon paprika (for color and a hint of smoky flavor)
- Salt and pepper to taste (master the seasoning)
- 2 large eggs (to bind everything together)
- 2 cups seasoned breadcrumbs (the secret to the perfect crunch!) – Panko breadcrumbs are ideal for extra crispiness.
- Cooking spray or olive oil spray (for that perfect golden hue)
Craving more chicken recipes? Try this Crockpot Creamy Garlic Parmesan Chicken!
3. Step-by-Step Instructions: Mastering the Art of Crispy Perfection
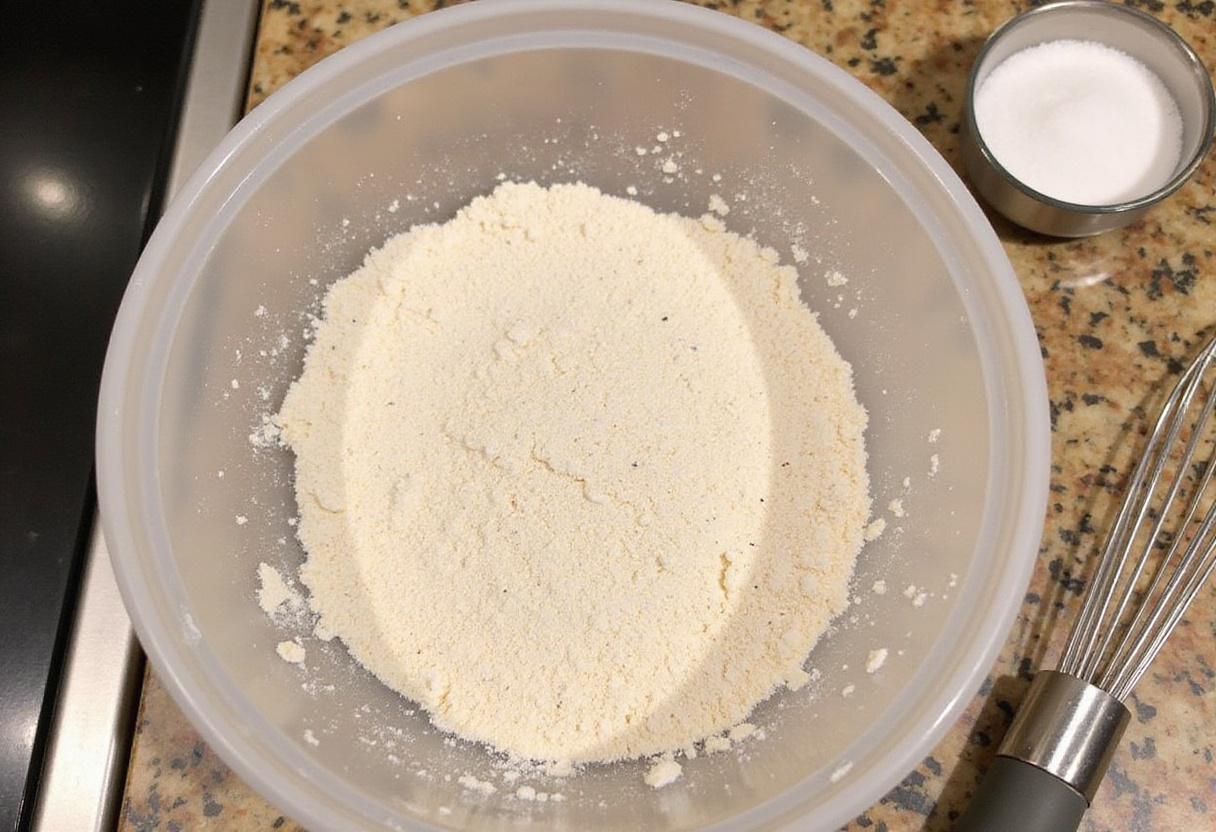
Step 1: Prepare the Seasoned Flour – The Foundation of Flavor
Start by preheating your oven to 400°F (200°C). This ensures that the chicken tenders will cook evenly and become perfectly crispy. In a shallow dish, diligently combine the all-purpose flour, garlic powder, onion powder, paprika, salt, and pepper. Really mixing these ingredients thoroughly will create a foundational, flavorful base for your soon-to-be-delicious chicken tenders. Don’t skimp on the seasoning—it’s key! For a spicy kick, consider adding a pinch of cayenne pepper.
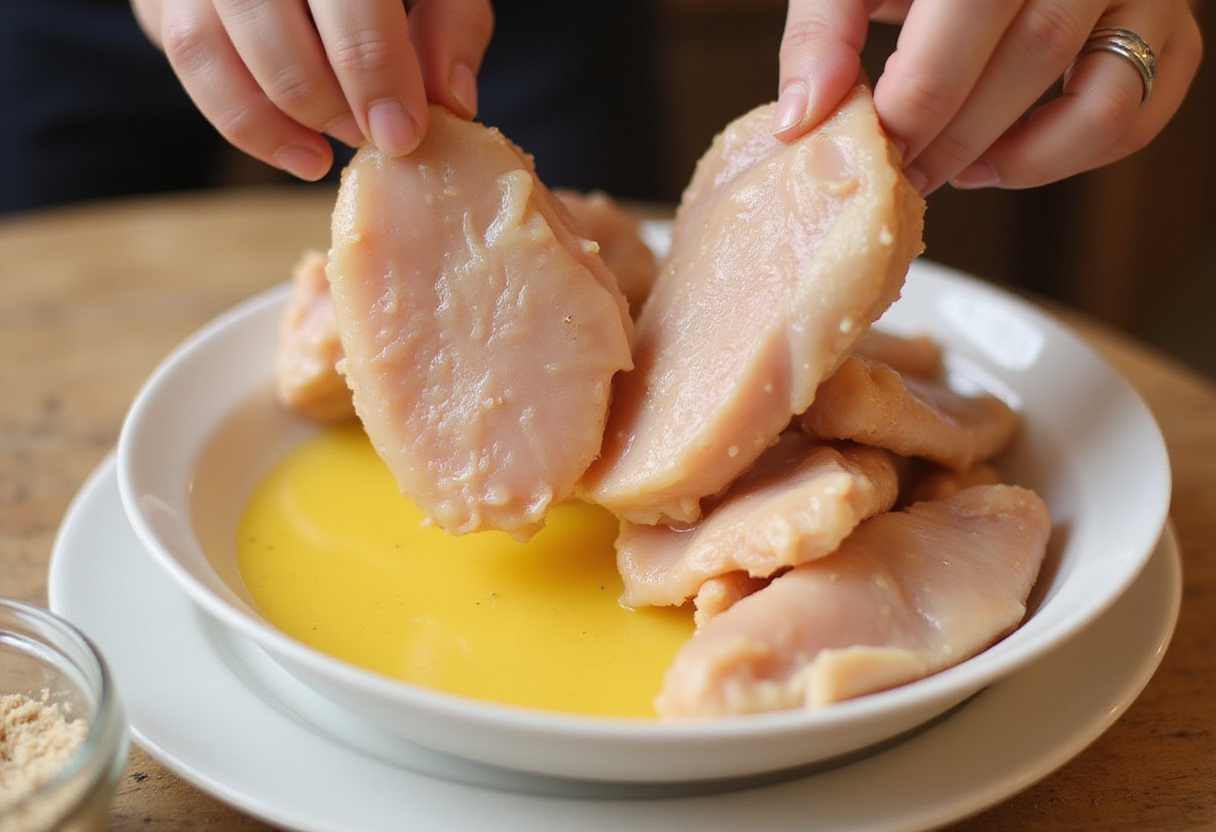
Step 2: Dipping Station – The Key to a Perfect Crust
Next comes the fun part – setting up an efficient breading or dipping station. In another shallow bowl, beat the eggs lightly. You will now carefully dip each individual chicken tender first into the seasoned flour mixture, then expertly into the beaten eggs (making sure to fully coat!), and finally, generously coat them with the seasoned breadcrumbs. This essential three-step process ensures a magnificently crispy coating that holds up beautifully during the baking process. Really press the breadcrumbs onto the chicken to help them adhere. For another great recipe idea, check out this Creamy Cajun Chicken Pasta!
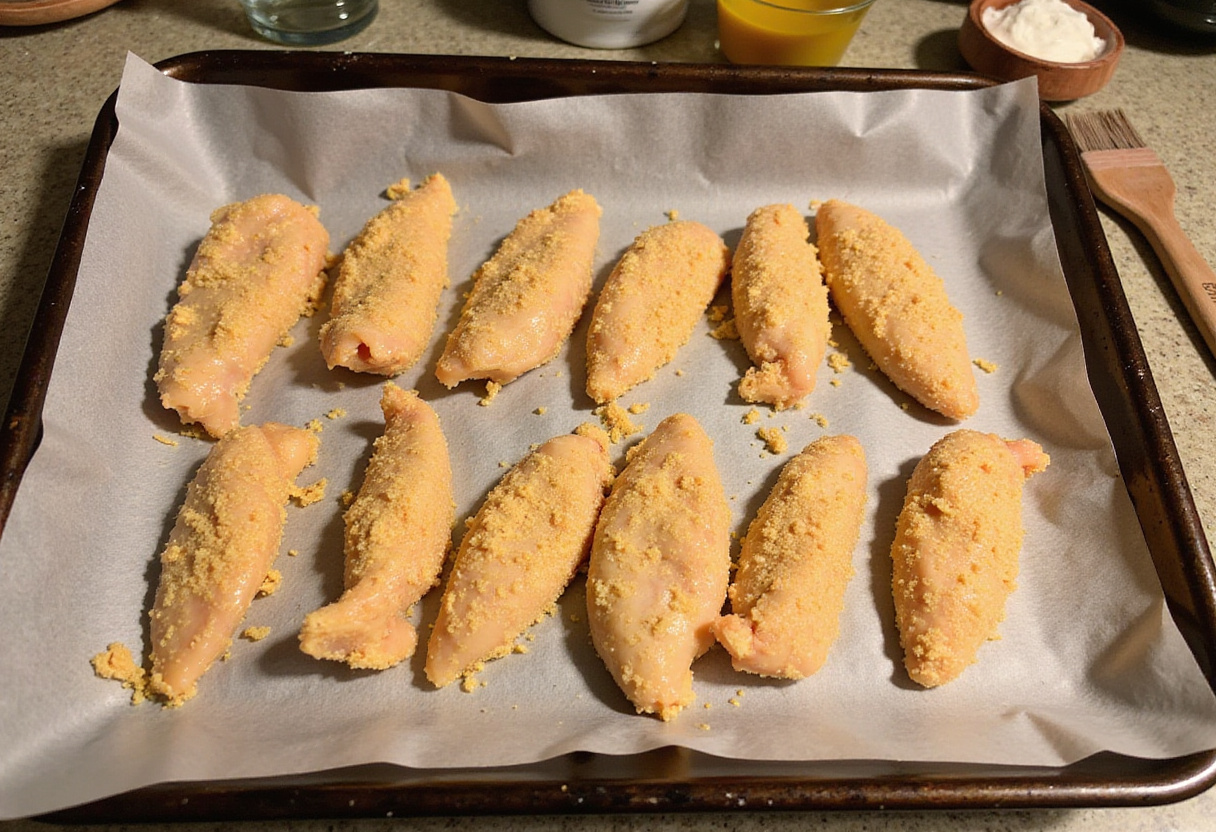
Step 3: Arrange on Baking Tray – Spacing for Maximum Crispiness
Carefully place the fully coated chicken tenders strategically onto a lightly greased baking tray. Make absolutely sure to leave a bit of space between each and every single piece to properly promote remarkably even cooking. Crowding the pan could result in less-than-crispy chicken tenders. For an extra crispy, professional-level finish, generously give the tenders a light, even spray with cooking spray or olive oil before delicately placing them in the preheated oven. Looking for something creamy? This Marry Me Chicken Pasta is hard to resist!
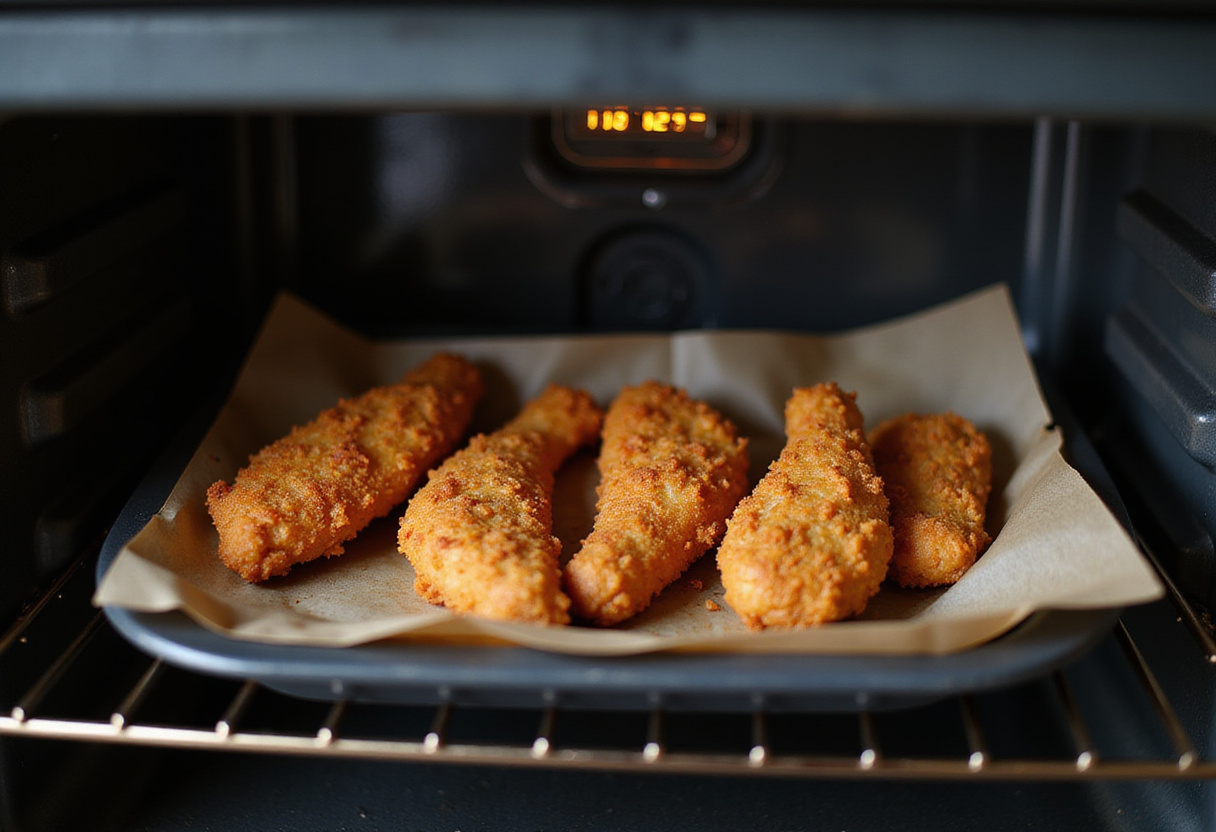
Step 4: Bake Until Golden – Achieving Tender Perfection
Carefully bake the prepared chicken tenders for approximately 15-20 minutes, attentively flipping them precisely halfway through the entire cooking time. The ultimate goal here is to achieve an even, delightfully golden-brown color, diligently ensuring that the chicken thoroughly cooks through to a thoroughly juicy and consistently tender perfection. This super-important step is absolutely crucial and imperative for all those who truly love and appreciate exceptionally crispy homemade baked chicken tenders! Before serving, let them rest for a couple of minutes to allow the juices to redistribute.
4. Storage Tips: Keeping Your Tenders Crispy
Any scrumptious leftover crispy homemade baked chicken tenders should ideally be promptly stored inside of an airtight container safely in the refrigerator for a maximum of up to 3 days. To effectively maintain their signature desirable crispy texture for as long as possible, carefully consider diligently reheating them ideally in a conventional oven or in an air fryer as opposed to using a microwave, which can often make them very soggy.
5. Serving Suggestions: The Perfect Pairings
These incredible crispy chicken tenders expertly pair beautifully alongside a diverse variety of delectable dipping sauces such as classic honey mustard, smoky barbecue sauce, cool ranch dressing, or even your own creative homemade concoction! Serve them together with a wholesome side of freshly steamed vegetables, a crisp and refreshing salad, or perfectly golden fries for a truly complete meal that everyone will absolutely love and enjoy! These dinner recipes is a great source of inspiration if you want to check some great ideas.
6. FAQs: Your Questions Answered
Q1: Can I conveniently use chicken breasts instead of pre-cut chicken tenders?
A: Yes, of course! You can definitely cut regular chicken breasts expertly into strips to conveniently create your own outstanding homemade chicken tenders. Just be absolutely sure to properly adjust the specific cooking time as deemed necessary to ensure thorough cooking.
Q2: How can I easily make these amazing chicken tenders gluten-free friendly?
A: To effortlessly make completely gluten-free-friendly chicken tenders, simply substitute the traditional all-purpose flour and standard breadcrumbs with high-quality gluten-free alternative options. There are many widely available and equally delicious substitutes to choose from!
Q3: Is it possible to properly freeze these fantastic chicken tenders for later?
A: Absolutely! You can expertly freeze the uncooked, carefully breaded chicken tenders properly for a maximum of up to three months without losing quality. Just be absolutely sure to thoroughly separate all of the total layers diligently with parchment paper inside of an airtight, freezer-safe container to absolutely prevent them from sticking together. For another great pasta recipe, check out this Creamy Ricotta Chicken Pasta Recipe!
7. Conclusion: Elevate Your Chicken Tender Game!
Making wonderfully crispy homemade baked chicken tenders is impressively simple and incredibly rewarding. With only a handful of readily available necessary ingredients and a super-straightforward cooking process, you can effortlessly create a truly delicious and deeply satisfying delectable meal. Whether you choose to enjoy them completely on their own, share them as a crowd-pleasing captivating appetizer, or thoughtfully incorporate them as an integral part of a much larger and more elaborate feast, these impressive chicken tenders are absolutely guaranteed to impress everyone! Don’t hesitate—go ahead and try out this incredible recipe today and effortlessly elevate your entire chicken tender culinary game up to exciting new heights! And while you’re at it, these recipes might be up to your alley: Shredded BBQ Chicken Mac and Cheese, Chicken and Broccoli Pasta, Smothered Chicken and Rice, Cajun Smoked Sausage Alfredo Pasta and Creamy Garlic Penne Pasta!
Print
Crispy Homemade Baked Chicken Tenders
- Total Time: 35 minutes
- Yield: 4 servings 1x
- Diet: Gluten-Free Option Available
Description
Indulge in the delightful taste of Crispy Homemade Baked Chicken Tenders, featuring tender chicken enveloped in a seasoned, crunchy coating. This healthier alternative to fried chicken combines simple ingredients for a flavorful experience that the whole family will enjoy.
Ingredients
- 1 pound chicken tenders
- 1 cup all-purpose flour
- 1 teaspoon garlic powder
- 1 teaspoon onion powder
- 1 teaspoon paprika
- Salt and pepper to taste
- 2 large eggs
- 2 cups seasoned breadcrumbs
- Cooking spray or olive oil spray
Instructions
- Preheat your oven to 400°F (200°C) and prepare the seasoned flour by mixing flour, garlic powder, onion powder, paprika, salt, and pepper in a shallow dish.
- Set up a dipping station by beating the eggs in another shallow bowl. Dip each chicken tender in flour, then eggs, and finally coat with seasoned breadcrumbs.
- Arrange the coated chicken tenders on a greased baking tray, ensuring space between each piece. Lightly spray with cooking spray for extra crispiness.
- Bake the chicken tenders for 15-20 minutes, flipping halfway through, until they are golden-brown and cooked through.
Notes
- Store any leftover tenders in an airtight container in the refrigerator for up to 3 days.
- Reheat in the oven or air fryer for the best crispy texture.
- For gluten-free options, substitute flour and breadcrumbs with gluten-free alternatives.
- Prep Time: 15 minutes
- Cook Time: 20 minutes
- Category: Main Course
- Method: Baking
- Cuisine: American
Nutrition
- Serving Size: 4 tenders
- Calories: 300 Kcal
- Sugar: 1g
- Sodium: 600mg
- Fat: 10g
- Saturated Fat: 2g
- Unsaturated Fat: 6g
- Trans Fat: 0g
- Carbohydrates: 30g
- Fiber: 2g
- Protein: 25g
- Cholesterol: 100mg